Top 10 tips for shrimp farming – the basics - Part 2
6. Take shrimp samples regularly
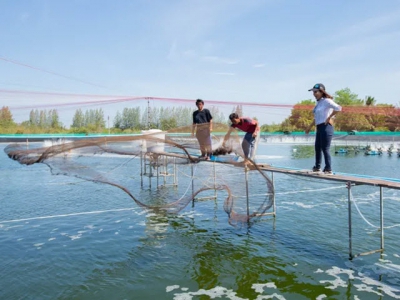
Sampling allows farmers to understand shrimp growth and adjust the feed regime, preventing overfeeding and underfeeding. It is recommended to take shrimp samples every five to seven days using nets appropriate to the current shrimp size. Sampling is done to estimate the mean body weight (MBW), which is calculated by dividing the total weight by the number of shrimp.
Applying probiotics during a partial harvest can reduce their stress levels and improve their finishing quality. Photo: Anne Thaisin
What is also important to note is how to take the samples, which should be done representatively. Avoid sampling near the feed trays because the shrimp there tend to be bigger than the rest. Take random samples vertically – covering the top, middle and bottom of the water column – as well as horizontally, covering various sides of the pond. Avoid sampling when the shrimp are moulting.
7. Use the baby bucket method for sampling
The total number of PL obtained from the hatchery is usually ascertained by counting a sample of the PL bags. After stocking, farmers usually do not take follow-up samples, but it is very important to know the survival rate 24 hours post-stocking. It may give us a clearer picture of the shrimp population after they have undergone a stress-inducing process and acclimatisation.
We are experimenting with the baby bucket method for estimating the survival rate. The baby bucket is a little bucket with holes on the side covered with mesh. To take a sample, fill the baby bucket with 100 PL and leave it on the surface of the pond for 24 hours. After 24 hours, the PL can be counted to estimate the initial data on population and survival rate. The data is crucial because it can be used to adjust the right feeding regime to avoid overfeeding or underfeeding.
8. Be aware of moulting
Moulting allows shrimp to grow bigger and is a moment in the shrimp grow-out period that needs particular attention. We need to know the moulting phase the shrimp is in by taking regular samples, this way we can better prepare when moulting happens. It is better to prepare the right environment by providing enough micro and macro nutrients to help the shrimp undergo the formation of the new exoskeleton. This may help prevent moulting problems and mortalities due to failed moults. Some of the beneficial minerals to help shrimp during moulting are: Ca, Cu, Mg, Na, P, K, Se, and Zn.
9. Apply probiotics at the right time
Probiotics are good bacteria which may boost shrimp growth, prevent stress and disease, as well as maintain good water quality. Probiotics are better applied at the beginning of the cycle, helping the juvenile shrimp acclimate to the new environment and enhance water quality. It is also recommended to apply probiotics during stressful situations for shrimp, such as water exchange and partial harvest. The good bacteria work by enhancing the shrimp gut health and maintaining a relatively good environment, both of which decrease the stress level.
10. Implement a nursery phase
Shrimp farmers usually stock PL from hatcheries directly to the grow-out ponds but this is risky because PLs have a relatively underdeveloped immune system. While it requires investment in infrastructure, a nursery phase helps reduce that risk by making sure that the immune systems of the PLs are enhanced before the grow-out period.
To achieve this, PL from hatcheries should be stocked in relatively small nursery ponds or tanks, with a density of more than 2000 PL/m2, for 30 days. The small size of the ponds/tanks, means that fewer probiotics are needed and these will be more effective compared to in bigger grow-out ponds, thus reducing mortalities and costs.
Conclusion - implementing the basics
We understand that each farm has specific needs and challenges. However, breaking it down to the basics, these tips are applicable to various farmers across different circumstances. We hope that these 10 simple tips can help shrimp farmers implement better management regimes for their farms.
There are a lot of other tips that are specific for each part of the culture period that we will cover, so stay tuned for our next instalment in this series.
Related news
 Top tips for setting up a recirculating aquaculture system (RAS) - Part 1
 Recirc systems are one of the boom areas in aquaculture at the moment, with new facilities being designed and built all over the world
 Top tips for setting up a recirculating aquaculture system (RAS) - Part 2
 An understanding of the chemistry at play in an RAS is also useful, as it helps to decide where and how to minimise risks.
 Top 10 tips for shrimp farming – the basics - Part 1
 Shrimp farming isn't easy - but getting the basics right can keep your ponds productive and disease-free.