Seed Saving 101: 10 Things to Know If You Want to Start Saving Seeds
As your garden starts producing fruit, keep this information in mind if you want to start saving seeds.
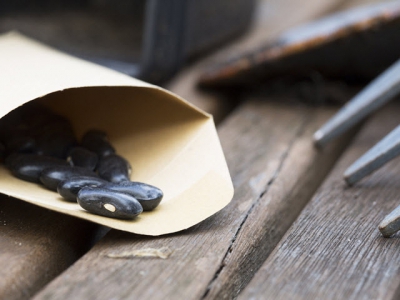
Legumes are by far the easiest seeds to save, and among the easiest to germinate. Photo: Charlotte Lake on Shutterstock.
Beans. That’s right. If you want to start saving seeds, we recommend beans. Or peas. Why? Legumes are by far the easiest seeds to save, and among the easiest to germinate. You can’t go wrong. With that, let’s learn more about the basics of seed saving.
Growing a Plant to Save Its Seed Is Different Than Growing It to Eat
And usually, you’re not getting both. In order for a plant like lettuce to produce seed, you must wait for it to send up its gangly flower stalks, which eventually produce tiny seed pods. By this time. the lettuce leaves are becoming yellow, shriveled, and bitter. It’s the same with most crops—you don’t get to eat it and save the seed; it’s either one or the other. The good news is that a single plant produces many seeds. So you usually need to grow only a few extra for seed-saving purposes.
Don’t Bother Saving Seeds of Hybrid Varieties
Seeds denoted on the package as “F1” are hybrids, meaning two varieties have been bred with one another (cross-pollinated, that is) to produce a third variety with a combination of traits from each “parent.” If you were to save seed from this hybrid offspring and plant it, each seed would grow into a plant with a random combination of the traits found in the gene pool of the original parents, which rarely produces something you’d want to eat. The only way to reproduce the hybrid “true-to-type,” as plant breeders say, is to cross the two original parents. That’s a big part of why most seed savers stick with old-fashioned heirloom varieties, which by definition are not hybrids.
Save Seeds from the Best Plants
To save seed is to participate in the process of natural selection. If you save seed only from the biggest tomato of the bunch and replant them year after year, you’ll eventually end up with seeds that produce plants on which all the tomatoes are bigger. The same holds true for almost any other trait. Want tomatoes that ripen earlier? Save seed from the first fruits to ripen each year. Want disease resistant plants? Then definitely don’t save seed from those that are disease-infested. This is essentially what professional plant breeders do. You don’t need to get too scientific about it, but as a rule of thumb, only save seed from your healthiest, most robust, tastiest plants.
Seed Saving Can Be Tedious
Bean seeds are big and easy to remove from their pods. But this is the exception rather than the rule. Carrot seeds, for example, are no bigger than a baby flea and easily disappear into the nearest crack or cranny as you try to knock them loose from their seed heads. Plants hold their seeds in an array of husks, pods, capsules, and other coverings, which are often not easily removed. This process varies depending on the species in question, but typically involves threshing (separating the seed from the plant) and winnowing (separating the seed from its hull). If you’re collecting only a very small quantity of seed, you’ll probably perform these tedious tasks by hand, but specialized tools are available for processing larger quantities.
Seed Saving Can Be Stinky
Seed that develops in a wet, fleshy fruit (tomatoes, melons, and cucumbers, for example), as opposed to a dry seedhead or pod (the case with most greens, herbs and legumes), often requires extra steps to extract. Such seed is typically encased in a gooey substance, from which it is not easily removed. The best way to remove the goo, as it turns out, is to put it in a jar or bucket with a bit of water and let the concoction rot for a bit. The fermentation process dissolves the goo and improves the germination rate of the seed. You then strain the seeds from the stinky liquid and dry them.
Seeds of Some Crops Are Easier to Save Than Others
Seeds are the products of pollination, the botanical version of sex. Some crops are self-pollinators, which means individual plants are fertilized by their own pollen. These crops, including beans, peas, tomatoes, peppers, and cauliflower, are among the easiest to save because you don’t need special botanical knowledge to ensure that the seeds grow out true-to-type.
Plant Sex Makes Things Complicated
It’s with cross-pollinating crops—those that need pollen from a neighboring plant in order to set seed—where things get complicated. This group includes cucumbers, corn, squash, pumpkins, and melons. If you have more than one variety of the same cross-pollinating vegetable (a butternut squash and acorn squash, let’s say) growing in close proximity, pollen from one will inevitably end up in the flowers of the other, resulting in seeds that are a mutant hybrid of both varieties. Seed savers employ various strategies to prevent this, ranging from growing different varieties on opposite ends of their property (pollen only travels so far on the wind or via insects) to placing plastic bags over some flowers to exclude unwanted pollen (you must then use a paintbrush to pollinate them with pollen from the same variety). Another option? Simply grow only one variety at a time of these particular crops.
Seeds Aren’t Viable Until Fully Ripe
Just like picking the perfect tomato, you have to wait until seed is fully ripe before you harvest it — if picked from the plant too soon, the seed will not germinate. As explained above, optimal seed maturity is usually later than optimal crop maturity. Bean and pea seeds are not ready until the pod is brown, dry, and beginning to split open. This is true of any seed that grows in a pod, which includes most greens. Corn seed should be allowed to dry on the cob in the field. Some vegetables, including cucumbers and eggplant, should not be picked for seed until they are overripe and beginning to shrivel up and rot.
Well-Dried Seed Is Viable Seed
In order to preserve seed for future plantings, it must be thoroughly dry. Drying out is essentially the final stage of ripening, and ensures that the seed does not become moldy while you’re waiting to plant it next year. Wet seed, once it has been extracted from its fermented goo, must be spread out to dry on screens in a warm location, ideally with a light breeze from a fan to hasten the process. Most other types of seed my be dried while still on the plant, but if the weather turns wet and cool before that can occur, you’ll need to bring them indoors to finish the process. To determine if seed is sufficiently dry, push a fingernail into it — if it gives, it’s not yet ready.
Proper Storage Is Important
Dried seed should be placed in paper envelopes or seed packets labeled with the name of the variety and the date it was harvested. To ensure longevity, keep the seed packets in mason jars in a cool dark place. Any seed stored this way should remain viable for at least a few years, though some crops may keep for a decade or more.
Related news
 What your cabbage seedlings should look like
 Farmers tend to accept the seedlings they’re given and don’t pay much attention to what sort of condition they’re in.
 Spacing cabbages for the correct size
 I’m often asked what the correct spacing should be when planting cabbages, as though there was only one answer. There’s more to spacing than just setting out
 Blackleg fungus in cabbages
 Blackleg is a fungal disease that affects cruciferous crops and can do a lot of damage. Look out for it and take precautions so you won’t get caught out.