How to Grow Your Own Tomatoes, Part 6: Saving Seeds
Swellphotography / Shutterstock
Every truck farmer is eager for the tomato crop to come in. Why? Because customers can’t get enough of these home-grown fruits, especially heirloom varieties. You can practically guarantee you’re growing the tastiest ones while cutting costs by saving and storing your own seeds.
You’ll want to avoid hybrids, which won’t reproduce true from saved seeds. To ensure purity, choose an heirloom variety that’s planted at least 10 feet away from other varieties. Ideally, you’d choose similarly sized and shaped fruits from more than one plant (preferably six or more); this helps preserve genetic diversity.
The tomatoes should be fully ripe at harvest and free of disease. If you’re concerned about the latter, dip fruits into a bleach solution (10 percent bleach; 90 percent water) and rinse before proceeding. You can expect to get 50 to 100 seeds from each medium-size fruit, and the seeds will be viable for at least five years, so it makes sense to save more rather than less.
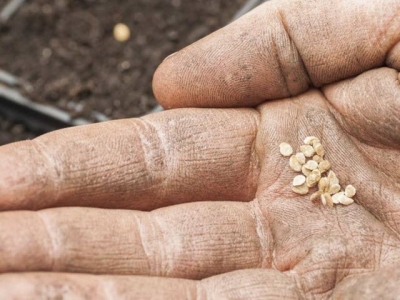
If you plan to save seed from more than one variety, be sure to label seeds clearly throughout the process.
Illustrations by McKibillo
Step 1. Slice and Squeeze

Cut the tomatoes in half horizontally and squeeze the pulp containing the seeds into a clean, water-tight container, such as a 5-gallon plastic jug, or a mason jar for smaller quantities. Fill the container about halfway with pulp. If necessary, add a little water to get a consistency like gazpacho. Cover the container with cheesecloth to keep out fruit flies and put it in a warm, dark place.
Step 2. Ferment

As the mush ferments, the jelly-like pulp adhering to the tomato seeds breaks down. The pulp is part of the tomato plant’s strategy for delaying germination, and has to be removed before the seed can be dried and stored. Within a few days to a week or so, a thick, off-white crust will form over the mush, and beneath it, the seeds will be floating in a thinner fluid. Scrape off the scum and check to see if the seeds are still slimy. If they are, allow them to ferment for a few more days.
Step 3. Strain

Once the fermentation is done and the seeds have lost their sliminess, pour them through some sort of sieve (a wire colander works well) and rinse thoroughly with water to remove any remaining surface gel. The seeds should mostly separate rather than stay in clumps.
Step 4. Dry

Dump the seeds onto a horizontal window screen set up to allow air circulation and spread them out as much as possible with your fingers. It’s best to dry them indoors, so they won’t blow away or get wet. Once the seeds are thoroughly dry, crumble any remaining clumps with your fingers.
Step 5. Store

Put the dried seeds in labeled, airtight mason jars or zippered food storage bags, and keep them in a refrigerator or cool, dark place.
Related news
 How to Grow Your Own Tomatoes, Part 3: Staking, Training and Pruning
 Tomato beds have an unfair reputation as the messiest, ugliest, most disease-ridden parts of a vegetable garden. To keep them from devolving to this sorry state
 How to Grow Your Own Tomatoes Part 4: Disease Prevention
 Tomatoes are prone to a laundry list of diseases, including viral, bacterial and fungal assailants. Growers in the eastern half of the continent are almost sure
 How to Grow Your Own Tomatoes, Part 5: Harvesting
 Within two months of plunking tomato seedlings in the ground, the fruit should be filling out and starting to turn color.