Growing Roses from Cuttings
Rose lovers are always talking with friends and fellow gardeners about their plants. Trading cuttings is a social medium of exchange that many take part in. Once you have a cutting from a prized rose bush, what do you do with it?
Many rose growers have never tried growing from cuttings and are intimidated by what appears to be a complicated process. It’s really quite simple. There are a lot of methods for rooting a cutting – transforming it from a chunk of wood off a bush to a rooted, growing plant. Let’s look at the most successful.
USING ROOTING MEDIUM
Many successful rose gardeners use a rooting medium (special soil-like planting media) specifically for getting the roots started on their cuttings. Some are basically nutrient-infused styrofoam, available at most garden stores. Others are special mixes of soil and fillers. Probably the most common and successful is a 50-50 blend of good (new) potting soil and perlite. This creates a nice, nutrient-rich medium for the cutting to root in but one that is light and airy enough that roots will have an easy time spreading.
USING ROOTING HORMONE
Specific formulations of hormone that encourage the rose cutting to sprout roots are available. These come in both powdered and paste form. The gardener usually just dips the cut and scored (“wounded”) stem into the hormone to coat the intended root portion of the cutting. The stem is then placed into the rooting medium or whatever is to be used to encourage rooting.
USING HEALTHY PLANTS WITH BLOOMING STEMS
While old growth that no longer blooms can produce a fine, strong and (eventually) blooming rose bush, new growth that is currently (or has just started) blooming is best. These younger cuttings are usually more robust and energetic than older growth and will often produce flowers in their first year.
USING CLEAN TOOLS
Obviously, you need to use very clean and sharp tools to avoid contaminating your cutting. Sharp tools, especially for cutting, make clean cuts rather than crushing the plant and causing bruising or other issues that you don’t need.
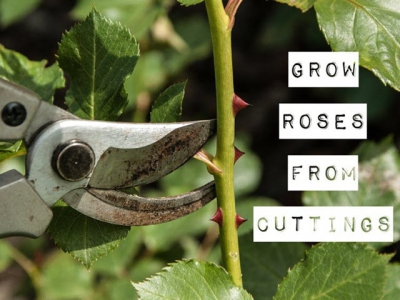
TAKING THE CUTTING
Before cutting the stem, prepare it for cutting first. While it’s still on the plant, many gardeners find that clearing the bottom leaves, flowers/buds, etc. before cutting and then allowing two or three days to recover often gives them better cuttings. Make the cut clean and sharp when removing it. Some prefer an angle to maximize the initial wound area while others prefer straight for cleanliness on the mother plant. Either is fine and probably makes little difference.
Once the cutting is separated, finish cleaning it with a warm, damp cloth. Then, using a very sharp knife, wound the plant to create your skinless area for roots to sprout from. Most gardeners do this by creating a 1-inch or so vertical “slice” that removes the skin at one end of the cutting (the “cut” side). Others use the tip of the knife to create shallow scores around the bottom of the cutting at 1 inch or so in length and just deep enough to fully penetrate the skin. In both cases, the white, inner core will be visible.
Once the cutting is prepared, it should be immediately placed into the medium or rooting method of choice. With proper care, roots will appear within a couple of weeks and the new plant will be ready for transplant to a more permanent location in a couple of months.
Related news
 Growing lettuce for the home garden – part 2
 This issue we look at the different kinds of lettuce available and which are best for your home garden.
 How to grow tomatoes
 Follow the expert advice in this guide to growing your own delicious crop of tomatoes.
 Dealing with Hawaiian beet webworm the biological way
 The Hawaiian beet webworm is a caterpillar that attacks beet and Swiss chard. The moth’s delta-shaped wings are brown with white stripes.